- Member ID
- #1290
- Messages
- 138
- Reactions
- 320
- Likes
- 67
- City
- Elizabeth
- State
- CO
- Country
- United States
I posted a reply in another discussion about some damage to the front splitter while on our 2100+ mile road trip. Specifically the damage was to the splitter(aka air dam) reinforcement. I had found the reinforcement to be cracked and had assumed it would be OK for the trip. During the trip I hit the splitter on pavement while exiting a steep driveway. That hit also popped the crack open and the unsupported section of reinforcement soon was dragging on pavement. A quick repair with duct tape got us back home. 
I’ve now replaced the reinforcement and wanted to document for others the process.
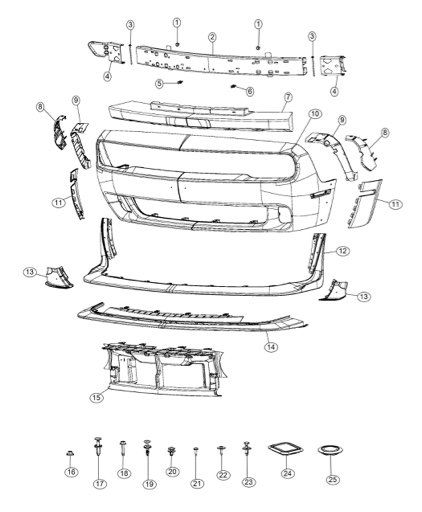
First here’s an image of the front fascia parts. The front splitter is item 12, p/n 68315879AA. The reinforcement is item 14, p/n 68319251AA.
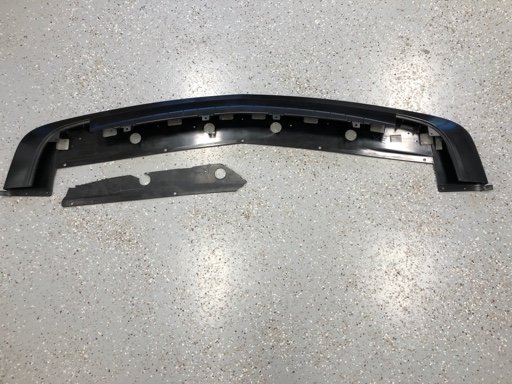
I ordered a replacement item 14 reinforcement, and replacement round and square rubber plugs p/n’s 68289232AA & 68289233AA. Below is a photo of the replacement reinforcement along with the broken section of reinforcement.
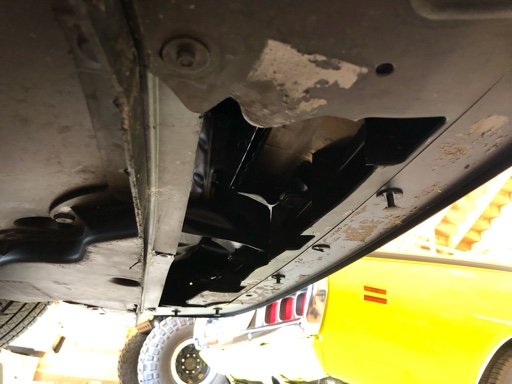
I ran the Redeye up the Race Ramps, removed the front and rear belly pans and then proceeded to remove the front splitter. The splitter attaches to the reinforcement with (15) push pins and (8) screws through mounting tabs accessible from underneath. Below is a photo of the broken area of the reinforcement while I was removing the push pins attaching the splitter to the reinforcement.
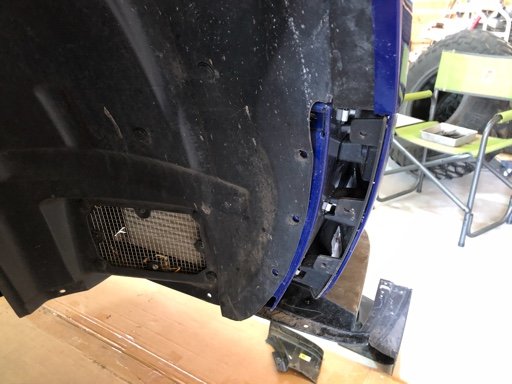
The splitter also attaches to the facia and front flares via (6) plastic rivets and (1) #25 Torx screw. Three of the rivets and the torx screw are covered by the wheel well liner. The liner is fairly flexible so just pull the liner aside to access. Of course I first had to remove the front tires to gain access to the area. I also needed to first remove the LH and RH closeouts pieces. Which attach via two plastic rivets to the reinforcement and two more rivets to the facia and flare. The next photo shows the passenger side area once everything was removed.
After that the splitter was easily removed.
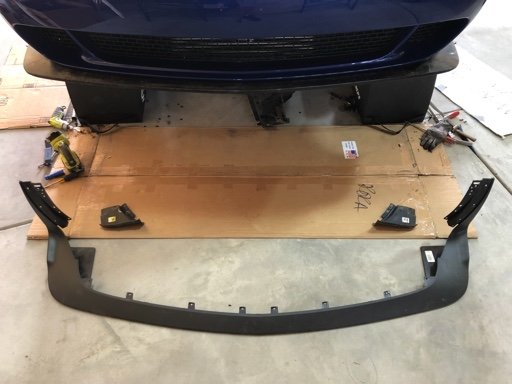
Next I removed (4) reinforcement attach screws and then removed the reinforcement. The reinforcement is a hard plastic and I took my time to make sure I did not damage the facia attach tabs. Said tabs are located in mating slots in the reinforcement. Good thing is the facia is also fairly flexible. There is interference between the reinforcement and hard plastic air deflectors located on either side of the radiator. Had to be very careful removing the old reinforcement.
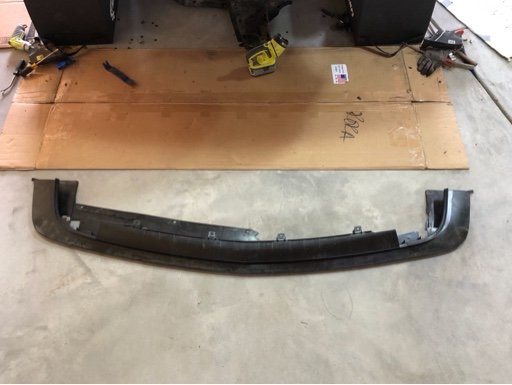
Damaged area. Believe the initial damage happened during shipping.
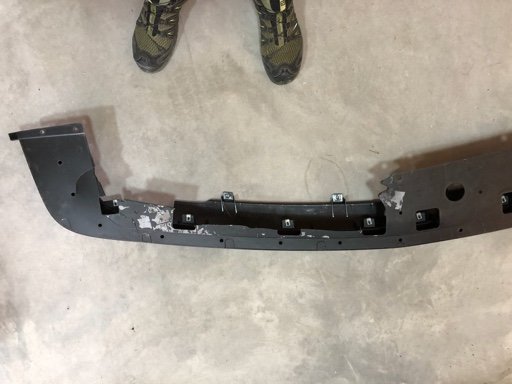
Reassembly went much quicker. I first transferred the (8) metal screw clips to the new reinforcement, cleaned out the dead bugs and dirt then reassembled in reverse order. The trickiest part was aligning all facia tabs into the reinforcement slots and holding in place while installing the reinforcement attach screws. After that it went pretty quick. Plus I learned a new skill - installing plastic rivets.
Wheel well back together.
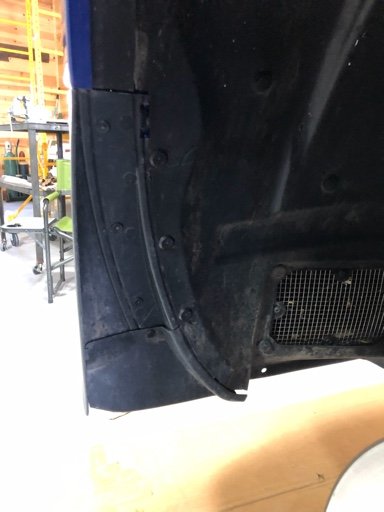
All done.
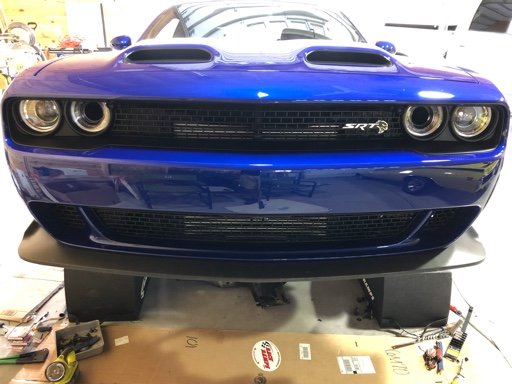
Hope this helps others. Definitely not as fun as bolting on drag radials but still a task that needed done.

I’ve now replaced the reinforcement and wanted to document for others the process.
First here’s an image of the front fascia parts. The front splitter is item 12, p/n 68315879AA. The reinforcement is item 14, p/n 68319251AA.

I ordered a replacement item 14 reinforcement, and replacement round and square rubber plugs p/n’s 68289232AA & 68289233AA. Below is a photo of the replacement reinforcement along with the broken section of reinforcement.

I ran the Redeye up the Race Ramps, removed the front and rear belly pans and then proceeded to remove the front splitter. The splitter attaches to the reinforcement with (15) push pins and (8) screws through mounting tabs accessible from underneath. Below is a photo of the broken area of the reinforcement while I was removing the push pins attaching the splitter to the reinforcement.

The splitter also attaches to the facia and front flares via (6) plastic rivets and (1) #25 Torx screw. Three of the rivets and the torx screw are covered by the wheel well liner. The liner is fairly flexible so just pull the liner aside to access. Of course I first had to remove the front tires to gain access to the area. I also needed to first remove the LH and RH closeouts pieces. Which attach via two plastic rivets to the reinforcement and two more rivets to the facia and flare. The next photo shows the passenger side area once everything was removed.

After that the splitter was easily removed.

Next I removed (4) reinforcement attach screws and then removed the reinforcement. The reinforcement is a hard plastic and I took my time to make sure I did not damage the facia attach tabs. Said tabs are located in mating slots in the reinforcement. Good thing is the facia is also fairly flexible. There is interference between the reinforcement and hard plastic air deflectors located on either side of the radiator. Had to be very careful removing the old reinforcement.

Damaged area. Believe the initial damage happened during shipping.

Reassembly went much quicker. I first transferred the (8) metal screw clips to the new reinforcement, cleaned out the dead bugs and dirt then reassembled in reverse order. The trickiest part was aligning all facia tabs into the reinforcement slots and holding in place while installing the reinforcement attach screws. After that it went pretty quick. Plus I learned a new skill - installing plastic rivets.

Wheel well back together.

All done.

Hope this helps others. Definitely not as fun as bolting on drag radials but still a task that needed done.
Last edited:
-
8
-
5
-
2
- Show All
